+
.png)
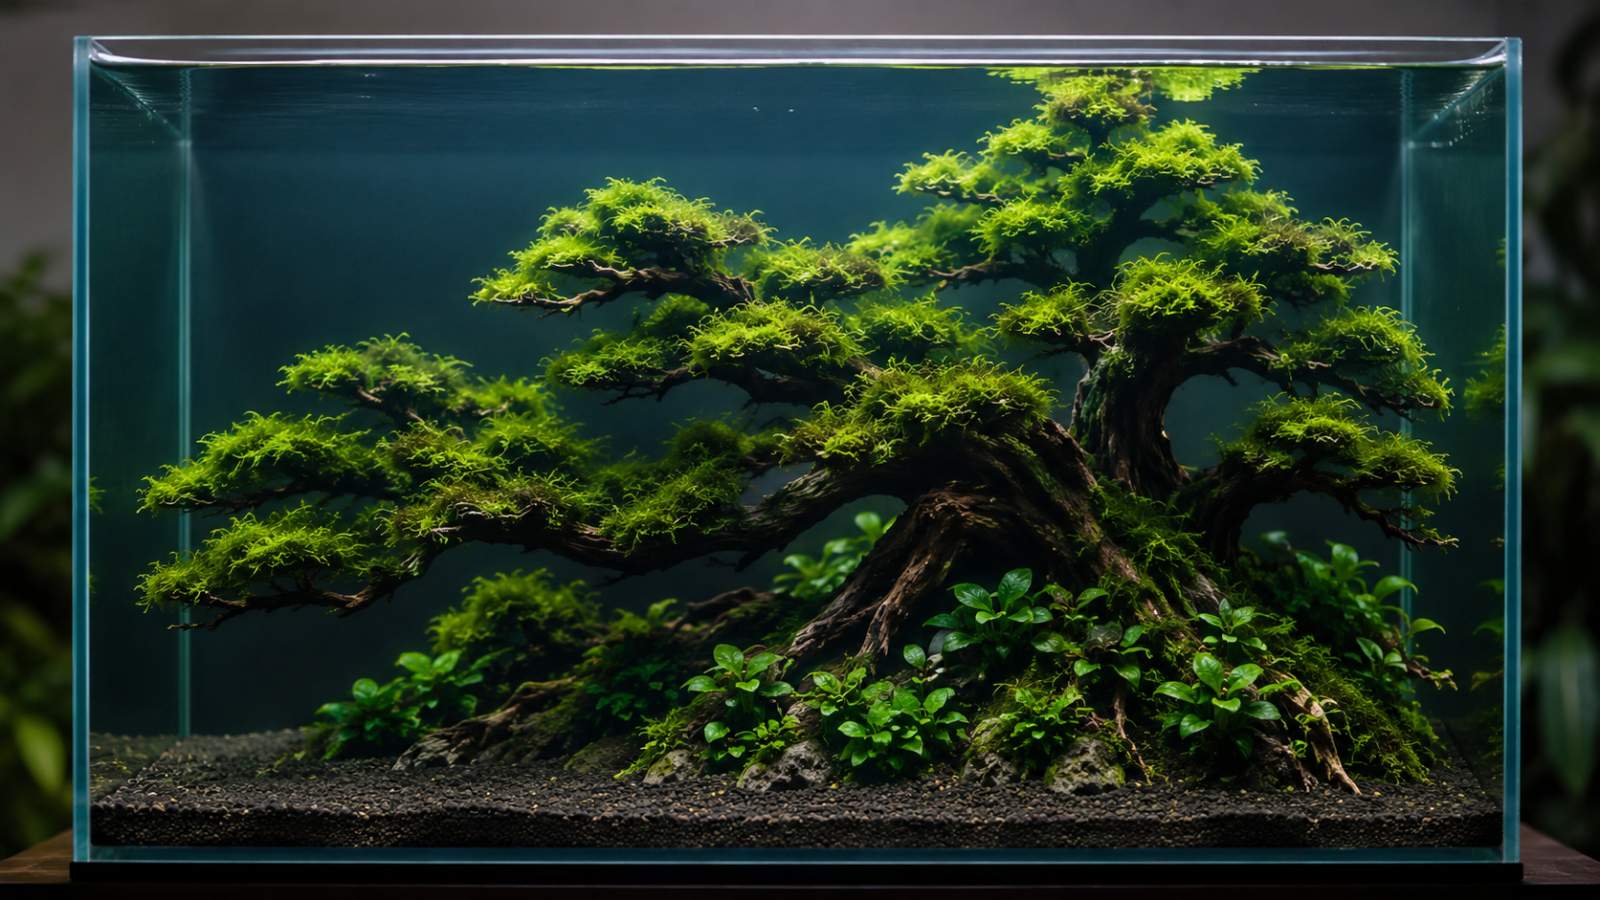
Most people spend $200 on a pre-made piece, drop it in the tank, and wonder why it looks fake. The wood is right. The moss is attached. But something's off. Nine times out of ten, the problem isn't the bonsai — it's everything around it.
This guide covers not just how to build or prepare an aquarium driftwood bonsai tree, but how to make it look like it belongs in the tank. We'll go through wood selection, the prep work that actually matters, the best plants for creating foliage, and the composition decisions that separate a good aquascape from a great one.
Let's get this out of the way: an aquarium bonsai tree is not a living tree in water. It's a piece of driftwood — sometimes one piece, sometimes several glued together — that's been shaped or selected to mimic the form of a miniature bonsai. The "leaves" are aquatic mosses and epiphytic plants attached to the branches.
The concept draws heavily from the Japanese wabi-sabi aesthetic and Takashi Amano's Nature Aquarium style, where the goal is to evoke nature rather than replicate it exactly. A well-executed aquarium bonsai doesn't look like a tree shoved underwater. It looks like a tree that has always been there — ancient, weathered, and completely at home.
I built my first driftwood bonsai for a 60P rimless using a piece of collected oak root and a fistful of Christmas moss from a local hobbyist. It took four attempts before the composition felt right. Everything I learned in those four attempts is in this post.
The single most important decision is the piece of wood itself. No amount of moss covers up a bad silhouette.
What to look for:
Wood types that work well:
Manzanita is the gold standard for pre-made bonsai pieces. It has tight, intricate branching, holds its structure long-term, and releases fewer tannins than most hardwoods. The downside: it's expensive, and quality varies.
Spider wood (also called azalea root) is the most widely available option. It's chaotic by nature — thin, claw-like branches spreading in every direction — which means you have to be selective. Look for a piece that reads as a tree shape from 1–2 meters away, not just up close.
Collected hardwood — oak, hornbeam, hawthorn — is the DIY route. Boil it thoroughly. Strip all bark. Let it soak for at least two weeks before use. The upside: completely free, completely unique.
Avoid softwoods (pine, spruce, cedar) — they rot fast and can leach resins that stress fish. Driftwood marketed as "decorative" or "craft wood" without species labeling is also a gamble; some of it is treated with preservatives that wreck water chemistry.
This step is where most beginners cut corners. Don't.
Step 1 → Scrub the wood
Use a stiff brush under running water. No soap, no detergent. You're removing surface debris, loose bark fragments, and any mold that formed during storage.
Step 2 → Boil (if the piece fits)
Boiling for 1–2 hours does three things: it sterilizes the wood, it drives out air pockets so the wood waterloggs faster, and it leaches a large portion of the tannins upfront. Change the water halfway through. The water will run dark brown — that's normal, that's what you want out of your tank.
For large pieces that don't fit in a pot, a bathtub soak of 10–14 days works, though it takes longer and sterilization is incomplete. I usually do a targeted boil on the base and lower trunk where most of the tannin load sits, then soak the rest.
Step 3 → Waterlog
After boiling, submerge the wood in a bucket with a weight on top. Change the water every 2–3 days. Most pieces are ready in 1–2 weeks — you'll know because the wood stops floating when the weight is removed.
If you're assembling multiple pieces into one tree, use aquarium-safe cyanoacrylate gel (super glue gel, not liquid). Apply it to both surfaces, press firmly, hold for 60 seconds. Let the assembly dry for 24 hours before soaking. Avoid the liquid formula — it runs into every crevice and can look awful on textured wood.
A note on tannins: Even after thorough prep, driftwood will leach tannins for weeks. In most tanks with a KH above 3–4 dKH, this isn't a problem. In low-KH soft water setups, monitor pH weekly. Active carbon in the filter will pull tannins out faster, though it also removes any beneficial humic acids you might actually want in a blackwater-style tank.
Here's where the bonsai comes alive. The wood gives you structure; the plants give you a living canopy that grows, shifts, and fills in over time.
Every good aquarium bonsai has moss. The species determines the character of the tree:
How to attach moss: Two methods work. Fishing line tied tightly around the branches is the most secure — wrap in multiple passes so the moss is held flush against the wood. Cotton thread works too, and it dissolves after 4–6 weeks, by which point the moss should have attached on its own. Super glue gel is the third option; blot the branch dry, apply tiny dots, press moss on, wait 30 seconds. It works, but it can bleach the wood surface slightly.
Thin layers attach better than thick clumps. I made this mistake on my first build — I piled moss on and it looked like a green snowball for months. Spread it sparse. It will fill in.
Anubias Nana Petite is the classic addition to the lower trunk and base. Tie the rhizome loosely to the wood with thread — never bury the rhizome in substrate. It grows slowly, lives for years, and adds a completely different leaf shape and color to the composition.
Bucephalandra in any variety adds iridescent shimmer. The small-leaf species like Buce 'Wavy Green' or Buce 'Brownie Purple' tuck perfectly into branch crotches and surface crevices. In a tank with decent flow and moderate light, they'll grow steadily and color up nicely.
Java fern (Microsorum pteropus) attached near the base creates an entirely different scale effect — the large leaves make the bonsai tree appear further away, adding perceived depth to the aquascape.
The rule of thirds applies here exactly as it does in photography. Place the trunk at roughly one-third from the left or right edge of the tank, not dead center. Center placement reads as symmetrical and static; off-center reads as natural and alive.
Negative space is your friend. The open water column next to and above the tree is part of the composition. Resist the urge to fill every corner. A single bonsai tree floating in clear water against a dark substrate has more visual power than a packed forest of plants competing for attention.
Foreground and midground framing:
Branch direction as eye-path: The direction the branches lean guides the viewer's gaze. A tree leaning left will draw the eye left; balance it with a rock grouping or plant mass on the right to complete the visual triangle.
One last thing worth mentioning: photograph your tank layout before you add water. The dry-land "aquascape preview" reveals issues with balance and proportion that are much harder to see once the tank is filled.
A driftwood bonsai is not a set-and-forget piece of hardscape. Here's what comes up.
White fuzzy biofilm on new wood: Common in the first 1–3 weeks. It's a harmless bacterial bloom that feeds on surface organics. Shrimp and snails will graze it down. It disappears on its own; don't scrub it off aggressively.
Moss turning brown at the tips: Usually a CO2 or light issue. Brown tips with green base = not enough light or too much flow. Full browning = CO2 crash or temperature shock. In a low-tech tank without CO2 injection, keep light in the 20–30 PAR range at the tree's level and don't expect fast growth.
Plants detaching from the wood: Normal in the first few weeks as threads loosen. Reattach with a tiny dot of super glue gel, or re-tie with fresh fishing line. By month two, most epiphytes will have attached holdfast roots that grip the wood directly.
Overgrown moss canopy: Trim with curved aquascape scissors every 4–6 weeks. Cut back to roughly 1cm from the branch surface. The regrowth comes in denser and more uniform. Left untrimmed, moss balls up and traps detritus inside — which causes anaerobic decomposition and can stress the wood over time.
Tannin tinting: If your water turns tea-colored months after setup, the wood still has tannins to release. Run activated carbon for 1–2 weeks. Increase water change frequency temporarily. The leaching does slow down and eventually stop — most pieces stabilize within 3–6 months.
Start with one good piece of driftwood. Get the prep right, attach a single moss species, and place it off-center on a clean substrate. Add the Anubias and Buce after the moss has had 3–4 weeks to settle. Build the composition slowly. The aquascape that looks like it took years to grow is usually the one where the aquascaper resisted the urge to add more.